Embroidery stitch guides, readily available as free PDFs, offer accessible learning for all skill levels. These resources feature picture tutorials and stitch diagrams.
Many guides, like those from DMC and Muse of the Morning, contain 50 stitches across 44 pages, perfect for enhancing embroidery projects!
Printing on 90lb cardstock and laminating ensures durability, while Adobe Reader is needed to open these valuable printable patterns.
What is an Embroidery Stitch Guide?
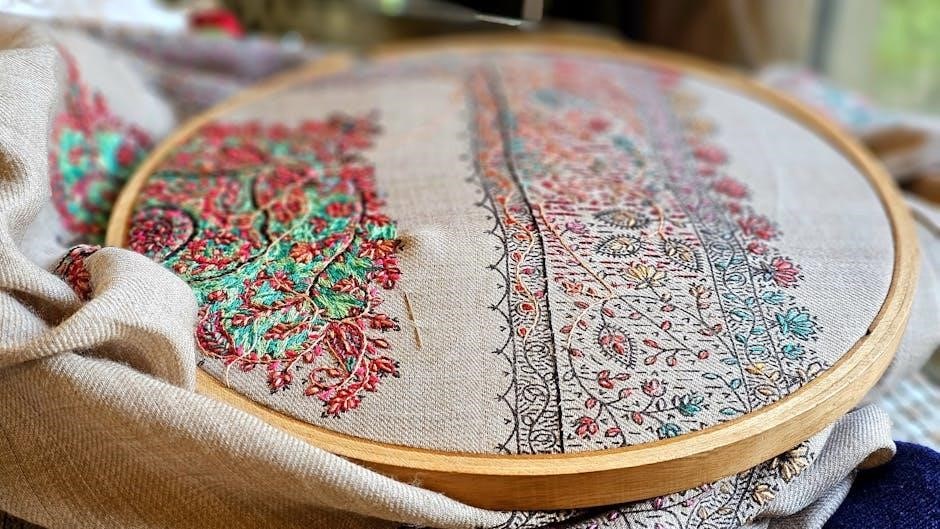
An embroidery stitch guide is a resourceful document designed to visually demonstrate various hand embroidery techniques. These guides, often available as free printable PDFs, serve as a comprehensive reference for stitchers of all levels, from beginners to experienced crafters.
Typically, a guide will include detailed picture tutorials and clear stitch diagrams, illustrating how to execute each stitch correctly. They often showcase a range of stitches, sometimes encompassing 50 stitches spread across numerous pages – like the 44 pages found in some free resources.
These guides aren’t just about how to stitch; they also provide valuable information on floss colors (like DMC suggestions) and can even include traceable patterns for practice. They are a foundational tool for expanding your embroidery skillset.
Why Use a Printable Guide?
Printable embroidery stitch guides offer unparalleled convenience and accessibility. Unlike digital resources, a printed guide is readily available whenever and wherever inspiration strikes – no need for a device or internet connection! They’re perfect for keeping in your sewing space for quick reference during projects.
Printing on quality paper, such as 90lb cardstock, and laminating the pages creates a durable, long-lasting resource. This protects against wear and tear, ensuring your guide remains pristine.
Furthermore, having a physical copy allows for easy annotation and personalization. You can mark favorite stitches, add notes, or even practice stitching directly onto the laminated surface, enhancing your learning experience.
Benefits of Free Resources
Free printable embroidery stitch guides democratize the art of embroidery, making it accessible to everyone regardless of budget. Resources from sites like DMC and Muse of the Morning provide a wealth of knowledge without financial barriers. This allows beginners to explore the craft without significant investment.
These guides often contain a substantial number of stitches – some offer 50 stitches across 44 pages – providing a comprehensive learning experience. They’re excellent for building a foundational stitch repertoire.
Utilizing free resources encourages experimentation and creativity, fostering a love for embroidery. They empower individuals to learn at their own pace and develop their unique style.
Basic Embroidery Stitches for Beginners
Free printable guides introduce essential stitches like running stitch and back stitch, forming the foundation of embroidery. These techniques are easy to learn!
Split stitch and stem stitch are also beginner-friendly, offering versatility for outlining and creating textured designs.
Running Stitch
The running stitch is arguably the most fundamental stitch in embroidery, frequently featured in free printable guides as a starting point for beginners. It’s incredibly versatile, used for outlining, creating dashed lines, or even filling larger areas with repeated rows.
Tutorials demonstrate a simple “up and down” motion, creating evenly spaced stitches on the fabric’s surface. The length of these stitches can be varied to achieve different effects – shorter stitches for finer details, longer stitches for quicker coverage.
Many free PDF books, like those from DMC, utilize the running stitch in introductory projects. It’s a building block for more complex techniques and a fantastic way to practice consistent stitch length and spacing. Mastering this stitch unlocks a world of embroidery possibilities!
Back Stitch
The back stitch, a cornerstone of hand embroidery, is prominently featured in numerous free printable guides due to its strength and ability to create solid lines. It’s often used for outlining designs, lettering, and creating detailed patterns where precision is key.
Tutorials illustrate a process of bringing the needle up a short distance ahead of the previous stitch, then going back down into the hole where the previous stitch ended – hence the name!
Free PDF resources, including those from Sarah’s Hand Embroidery Tutorials, demonstrate how the back stitch forms a continuous, unbroken line. It’s also the foundation for the Back Stitch Family of stitches, offering a versatile starting point for more advanced techniques.
Split Stitch
Split Stitch, a textured and versatile technique, is frequently included in free printable embroidery stitch guides. It’s known for creating a slightly raised, rope-like effect, making it ideal for outlining and filling small areas with a unique visual appeal.
PDF tutorials demonstrate bringing the needle up through the fabric, then down through the center of the previous stitch. This “splitting” action creates the characteristic textured line.
Resources like those available online showcase how Split Stitch offers a beautiful alternative to back stitch for outlining. It’s a valuable addition to any embroiderer’s repertoire, easily learned with the help of free printable guides and clear diagrams.
Stem Stitch
Stem Stitch, a foundational technique in embroidery, is commonly featured in free printable embroidery stitch guides. It’s renowned for creating smooth, slightly twisted lines, making it perfect for outlining floral stems, vines, and lettering.
PDF guides illustrate bringing the needle up a short distance from the previous stitch, then inserting it back down into the end of that stitch, always keeping the working thread to the same side.
This creates a consistent, elegant line. Free resources often demonstrate variations for thicker or thinner stems. Mastering Stem Stitch, with the aid of diagrams, unlocks a world of decorative possibilities for any embroidery project.
Intermediate Embroidery Stitches
Free printable guides expand skills with stitches like Satin Stitch, Long and Short Stitch, French Knots, and Chain Stitch, adding texture and depth.
These techniques build upon basics, offering more complex designs for experienced stitchers.
Satin Stitch
Satin Stitch is a fundamental intermediate embroidery stitch, creating a smooth, glossy surface resembling fabric. Free printable guides demonstrate how to fill shapes with closely packed, parallel stitches.
This technique requires consistent tension and stitch length for a professional finish. Beginners often find it challenging, but practice with printable stitch diagrams improves control.
Satin Stitch excels in floral designs, lettering, and monograms, adding a luxurious feel to projects; PDF tutorials often showcase variations, like padded satin stitch for raised effects.
Mastering Satin Stitch unlocks creative possibilities, allowing stitchers to achieve stunning visual textures and detailed embellishments. It’s a cornerstone of many advanced embroidery techniques.
Long and Short Stitch
Long and Short Stitch, an intermediate technique, creates beautiful shading and texture in embroidery. Free printable guides illustrate how to alternate between long and short stitches within a shape.
This method is ideal for blending colors seamlessly, particularly in petals or leaves. PDF tutorials often emphasize gradual transitions for a realistic effect.
The stitch direction changes with each row, preventing a harsh, striped appearance. Consistent stitch length and tension are crucial for a smooth finish.
Long and Short Stitch is frequently used in filling stitches, offering depth and dimension to embroidered designs. Practice with printable patterns builds confidence.
French Knot
The French Knot, a popular intermediate stitch, adds texture and dimension to embroidery projects. Free printable guides provide step-by-step visuals for mastering this technique.
Creating a French Knot involves wrapping the thread around the needle multiple times before inserting it back into the fabric near the original entry point.
PDF tutorials emphasize maintaining consistent tension to form a neat, rounded knot. Practice is key to achieving uniform size and placement.
French Knots are versatile, used for flower centers, eyes on animals, or scattered decorative elements. Printable stitch guides often demonstrate various applications.
Chain Stitch
The Chain Stitch is a foundational intermediate embroidery stitch, resembling a chain link. Free printable guides offer clear diagrams for learning this versatile technique.
This stitch involves bringing the needle up through the fabric, creating a loop, and then re-inserting the needle through the loop before pulling it taut.
PDF resources highlight maintaining consistent loop size for a uniform appearance. It’s excellent for outlining shapes, creating borders, or filling areas.
Printable stitch guides often showcase variations like whipped chain stitch, adding texture. Mastering the Chain Stitch unlocks numerous decorative possibilities in embroidery!

Advanced Embroidery Stitches
Advanced techniques like Herringbone, Ladder Stitch, and Couching elevate designs. Free printable guides detail these complex stitches for skilled embroiderers!
Herringbone Stitch
Herringbone Stitch, a beautiful and textured stitch, is created by making a foundation with two parallel rows of Back Stitches. These rows are stepped, meaning each stitch slightly offsets the previous one, forming the characteristic “V” shape resembling a fishbone.
Free printable embroidery stitch guides often illustrate this process clearly, showing how to consistently step the back stitches to achieve a neat and even pattern. The stitch is versatile, used for filling areas or creating decorative lines.
Understanding the foundation of Back Stitch is crucial for mastering Herringbone Stitch. Guides will demonstrate how “A lies between a-b, B lies between b-c, and so forth,” ensuring a smooth and visually appealing result. It’s a fantastic stitch for adding depth and dimension to your embroidery projects!
Ladder Stitch
Ladder Stitch, often found within free printable embroidery stitch guides, creates a woven, ladder-like appearance. It’s typically used for delicate details or as a decorative element, adding subtle texture to your embroidery work. This stitch is often grouped with Herringbone Stitch and Filling Stitches.
Guides will visually demonstrate how to bring the needle up and down through the fabric, alternating sides to form the “rungs” of the ladder. Consistent stitch length is key to achieving a neat and even result.
Resources like Sarah’s Hand Embroidery Tutorials may offer detailed instructions and diagrams. Mastering this stitch enhances your ability to create intricate and visually appealing embroidery designs, offering a unique aesthetic touch.
Filling Stitches
Filling Stitches, detailed in many free printable embroidery stitch guides, are essential for covering larger areas within a design. These stitches create solid blocks of color or texture, providing a complete and polished look to your embroidery projects. They often work alongside stitches like Ladder Stitch and Herringbone Stitch.
Guides will illustrate various techniques, focusing on achieving even coverage and minimizing gaps. Stitch direction and density can be adjusted to create different visual effects.
Resources like those from DMC and Muse of the Morning showcase examples and instructions. Mastering filling stitches is crucial for bringing depth and dimension to your embroidered artwork, completing the overall design beautifully.
Couching Stitch
Couching Stitch, often featured in free printable embroidery stitch guides, is a decorative technique used to secure thicker threads or cords onto fabric. It involves laying the thread across the surface and then securing it with small stitches, creating a raised, textured effect.
These guides demonstrate how to create neat, evenly spaced couching stitches for a professional finish. It’s a versatile stitch, ideal for outlining shapes or adding embellishments to designs.
Resources from sites like Sarah’s Hand Embroidery Tutorials provide clear instructions and diagrams. Mastering couching opens up possibilities for unique and eye-catching embroidery, adding dimension and visual interest to your projects.

Understanding Stitch Families
Embroidery stitches are often grouped into families based on technique similarities, aiding learning. Free printable guides categorize stitches like the Back Stitch Family.
Understanding these groupings simplifies mastering variations and expands creative possibilities within embroidery projects.
Back Stitch Family
Back Stitch and its variations form a foundational stitch family in embroidery, offering versatility and control. Sarah’s Hand Embroidery Tutorials highlights this grouping, demonstrating how techniques build upon the core Back Stitch method.
Creating a base with parallel Back Stitches, stepped slightly apart, is a key technique within this family. This method is particularly useful for outlining shapes and creating solid lines with a textured appearance.
The Back Stitch Family excels in detailed work, allowing stitchers to precisely define designs. Understanding this family unlocks a range of possibilities for creating intricate and visually appealing embroidery pieces, as detailed in free printable guides.
Darning Stitches
Darning stitches, while traditionally used for repairing holes in fabric, are incredibly versatile in embroidery, offering unique textures and filling techniques. These stitches often involve a series of closely spaced stitches worked over an area, creating a dense and durable surface.
Free printable embroidery stitch guides often showcase various darning stitch variations, demonstrating their application beyond simple repairs. They are excellent for creating textured backgrounds or filling larger areas with interesting patterns.
Exploring darning stitches expands your embroidery toolkit, allowing for creative expression and innovative design solutions. These techniques, readily available through online resources, add depth and character to any project.
Filling Stitch Groups
Filling stitch groups encompass a diverse range of techniques designed to cover larger areas within an embroidery design, creating solid blocks of color or textured effects. Free printable embroidery stitch guides often categorize these stitches based on their structure and application.
Common examples include satin stitch, known for its smooth, polished finish, and long and short stitch, which offers a more textured and shaded appearance. These guides demonstrate how to effectively utilize these stitches for optimal coverage.
Understanding these groups allows for informed stitch selection, enhancing the visual impact and overall quality of your embroidery projects. Resources like Sarah’s Hand Embroidery Tutorials provide detailed instructions.

Resources for Free Printable Guides
DMC provides free cross-stitch patterns and guides, while Muse of the Morning offers printable PDFs with 50 stitches. Sarah’s Hand Embroidery Tutorials are also excellent!
DMC Free Patterns & Guides
DMC stands as a premier resource for embroidery enthusiasts seeking free patterns and comprehensive guides. Their offerings span a diverse range, catering to both beginner and more modern aesthetic preferences. You can readily download free cross-stitch patterns directly from their website, available in convenient printable PDF formats.
These resources aren’t limited to just cross-stitch; DMC also provides guides supporting various hand embroidery techniques. The availability of these free resources makes exploring new stitches and projects incredibly accessible. Many downloadable guides include detailed instructions and color palettes, often referencing their popular DMC floss colors, streamlining your project preparation.
Exploring DMC’s digital library unlocks a wealth of creative inspiration and practical guidance for stitchers of all levels.
Muse of the Morning Resources
Muse of the Morning provides valuable free printable embroidery stitch guides, designed for convenient collection and storage within your sewing space. These guides are particularly effective when laminated, enhancing their durability for repeated use. The website publishes booklets containing detailed instructions for various stitches, offering a structured learning experience.
Notably, these resources are delivered as PDF printables, requiring a program like Adobe Reader to access. The guides are thoughtfully crafted to assist stitchers in mastering new techniques and expanding their embroidery skillset. They represent a fantastic option for those seeking readily available, high-quality instructional materials.
Muse of the Morning’s commitment to accessible education makes embroidery more approachable for all.
Sarah’s Hand Embroidery Tutorials
Sarah’s Hand Embroidery Tutorials offers a wealth of resources, including guides focused on the Back Stitch Family, providing a foundational understanding of related techniques. These tutorials delve into creating variations by building upon parallel rows of Back Stitches, stepping them strategically for unique effects.
The resources are designed to be comprehensive, catering to stitchers of all levels, from beginners to experienced crafters. They emphasize a clear, step-by-step approach to learning, making complex stitches more manageable.
Sarah’s guides often include stitch diagrams and detailed instructions, ensuring a thorough grasp of each technique. These are excellent free printable embroidery stitch guides.
Preparing to Print Your Guide
Free printable guides require Adobe Reader or a compatible PDF reader for access. Printing on 90lb cardstock is recommended, and laminating adds durability!
Paper Quality (90lb Cardstock Recommended)
Choosing the right paper significantly impacts the longevity and usability of your free printable embroidery stitch guides. While standard printer paper works, it lacks the robustness needed for frequent handling and reference. 90lb cardstock is highly recommended due to its increased thickness and durability.
This weight provides a sturdier feel, resisting tearing and bending, especially when repeatedly consulted during stitching sessions. It also enhances the print quality, making the stitch diagrams and instructions clearer and easier to follow. Investing in cardstock transforms a simple printable into a lasting, practical resource for your embroidery journey. Consider the long-term value when selecting your paper!
PDF Reader Requirements (Adobe Reader)
To access and utilize your free printable embroidery stitch guides, a PDF reader is essential. Most guides are distributed in the Portable Document Format (PDF) to ensure consistent formatting across different devices and operating systems. Adobe Reader is the industry standard and is widely recommended for optimal viewing and printing.
While other PDF readers exist, Adobe Reader guarantees accurate rendering of the stitch diagrams, color palettes, and textual instructions. It’s a free and readily available software download. Ensure you have the latest version installed to avoid compatibility issues and enjoy all features. Without a PDF reader, you won’t be able to open and benefit from these valuable resources!
Laminating for Durability
Free printable embroidery stitch guides, while readily available, are often printed on standard paper. To ensure longevity and withstand frequent use, laminating your guides is highly recommended. This protective layer shields the paper from wear and tear, preventing creases, rips, and fading from handling and potential spills.
Lamination creates a wipeable surface, ideal for keeping your guides clean while referencing them during projects. It allows for repeated use without degradation, making your investment in these resources worthwhile. Consider using self-adhesive laminating sheets or professional lamination services for a polished and durable finish, preserving your stitch knowledge for years!
Essential Embroidery Tips
Avoid knots by not tying them at the thread’s end; instead, begin stitching immediately. Select DMC floss colors wisely and utilize traceable patterns effectively.
Avoiding Knots in Your Thread
Knots are a common frustration for embroiderers, but thankfully, they’re easily avoidable! A primary tip, consistently highlighted in free printable embroidery stitch guides, is to completely eliminate tying knots at the end of your thread.
Instead of knotting, begin your stitching by carefully weaving the thread through the fabric from the back, securing it within the stitches themselves. This creates a clean finish without unsightly bulges on the right side of your work.
Proper thread management also helps; avoid excessively long thread lengths, as they are more prone to tangling and knotting. Regularly check your thread as you stitch, gently untwisting any minor loops before they escalate into problematic knots.
Following these simple steps will significantly improve your embroidery experience!
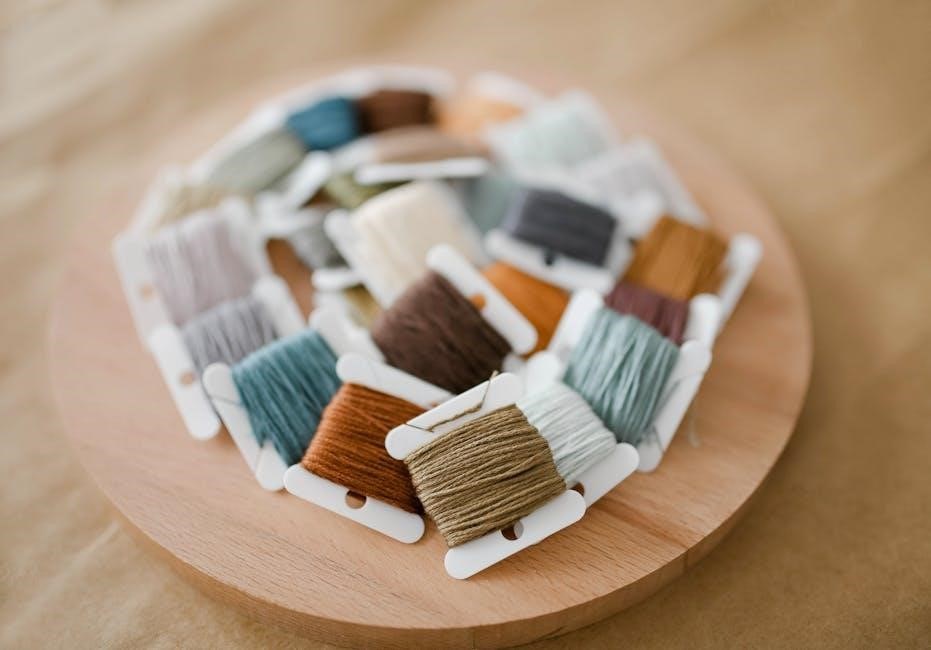
Thread Selection & Floss Colors (DMC)
DMC floss is a widely recommended choice for embroidery, celebrated for its quality, extensive color range, and availability. Free printable embroidery stitch guides often utilize DMC color numbers for easy replication of patterns.
When selecting thread, consider the fabric weight and desired stitch effect. Heavier fabrics benefit from thicker threads, while finer fabrics pair well with thinner floss. Experimenting with different thread types – cotton, silk, or rayon – adds texture and visual interest.
Many guides, like the Stitching Raccoon Sampler, provide DMC floss color suggestions, simplifying the color-matching process. Don’t be afraid to explore color combinations and create your unique palette!
Traceable Pattern Usage
Free printable embroidery stitch guides frequently include traceable patterns, simplifying the design transfer process onto your fabric. These patterns are designed for convenience, allowing stitchers of all levels to easily recreate beautiful designs.
To utilize a traceable pattern, print the guide onto suitable paper and secure it to your fabric. Use a light source – a window or light box – to clearly view the pattern through the fabric. Trace the design using a water-soluble or heat-erasable pen.
The Stitching Raccoon Sampler offers a traceable pattern, alongside reverse pattern options for added flexibility. Ensure the tracing is clear and precise for optimal stitching results!
Expanding Your Stitch Knowledge
Free printable guides offer stitch diagrams and detailed instructions, alongside sampler patterns. Explore reverse pattern options to broaden your embroidery skills!
Stitch Diagrams & Instructions
Free printable embroidery stitch guides excel in providing clear, visual learning tools. These guides commonly feature detailed stitch diagrams, illustrating each step of the embroidery process with precision.
Alongside the diagrams, comprehensive instructions are included, breaking down complex stitches into manageable steps for beginners and experienced stitchers alike. Resources like the Stitching Raccoon Sampler pattern specifically include stitch diagrams alongside traceable patterns and floss color suggestions.
These instructions often cover thread handling, needle positioning, and stitch formation, ensuring a successful outcome. The availability of these resources empowers individuals to confidently learn and master a wide range of embroidery techniques, fostering creativity and skill development.
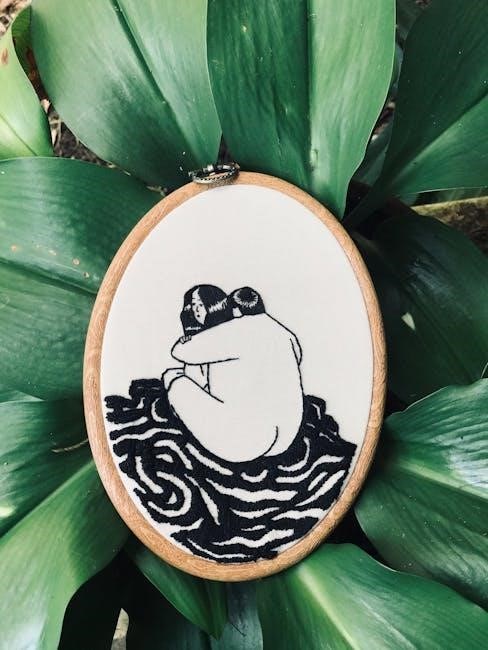
Sampler Patterns & Stitch Guides
Free printable embroidery stitch guides often incorporate sampler patterns, offering a practical way to practice multiple stitches within a single design. These samplers act as mini-projects, allowing stitchers to experiment with different techniques and build confidence.
The Stitching Raccoon Sampler exemplifies this, providing a complete package with a stitch guide, penguin and fish motifs, and DMC floss color suggestions. These patterns are designed to showcase the versatility of various stitches, encouraging exploration and creativity.
By working through a sampler, stitchers can develop a comprehensive understanding of stitch characteristics and applications, ultimately enhancing their embroidery skills and design capabilities.
Reverse Pattern Options
Many free printable embroidery stitch guides thoughtfully include reverse pattern options, catering to both right-handed and left-handed stitchers. This feature ensures accessibility and convenience for all users, eliminating the need for manual mirroring.
The Stitching Raccoon Sampler, for instance, provides an additional pattern in reverse, simplifying the tracing process for left-handed individuals. This consideration demonstrates a commitment to inclusivity within the embroidery community.
Having a reversed pattern readily available saves time and effort, allowing stitchers to begin their projects immediately without the hassle of flipping the design. It’s a small detail that significantly enhances the user experience.